TOC:
- Motivation
- Step A: Requirements
- Step B: Physical setup and formatting
- Step C: Mounting and configuration
- Step D: Test out your new time machine
- Maintenance and Conclusions
Motivation
I have a Macbook Pro (2017) dedicated exclusively to my work as a graduate student. If I lost it and had no backup, i would be uttely devastated. Having a backup is an absolute necessity - as the saying goes:
If you have one copy of your data, you really have zero.
Since the connector for the HDD is USB 3.0 but my Macbook only accepts USB-C type connections, a dongle is required. Plugging in a drive via a dongle is annoying and (in my experience) unreliable, depending on the dongle. Yes, I am aware we are dealing with some real first-world-problems here, but…

There has to be a better way. Why not wireless, automatic, and reliable?
Well, I could buy an official Apple AirPort Time Capsule, right?
Let’s see how much these are going for now…
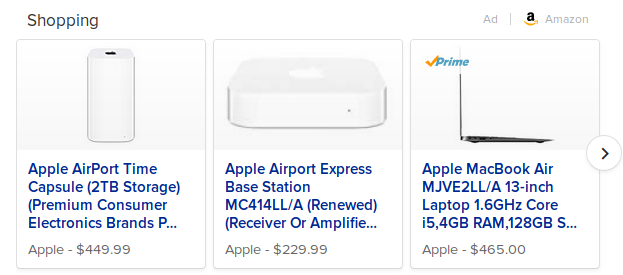
Ah, cool. More than rent in most states.
Since I already had a hacky home cloud set up and the needed hardware to make the Time Capsule, I decided to add a wireless time machine backup to my existing setup. What I wound up with was a system that:
Well it turns out getting it configured was not too troublesome (compared to my expectations, at least). Most of the guides I found on tech forums worked somewhat but did failed at some step in the process. I am hoping this guide can serve as a relatively reliable way to get a Pi Time Capsule working on your system. With that, I’ll add the disclaimer:
Possible frustration level: 8⁄10
Check out the guide below on how to do it.
Step A: Requirements
What you’ll need:
- A Macbook with macOS 10.14+ installed on it. I’m not sure if this will work with versions of 10.15 or later.
- An external HDD, preferrably with more than 1TB storage.
- A Raspberry Pi (3b, 3b+, or 4 will work) with SSH access on the local network.
- A router
What I’m using, for reference:
- A Seagate 2TB (model number STGX2000400) external HDD
- A 2017 MacBook Pro with touchbar running macOS 10.14.4
- A raspberry Pi running Ubuntu Xenial 16.04.6 Server Edition
- A Motorola SBG6580 router (yes, it’s ancient, I know). It’s connected to the raspberry Pi via ethernet.
The technique in this guide uses Samba for the network transfer protocol and does not require Netatalk, which was required on older versions of macOS. If you don’t mind configuring Netatalk (and the consequent headaches), I recommend you look up one of the many available guides for Netatalk configuration.
Step A1: Install HFS+ Software requirements
In this step, we’ll download and install the requirements for working with Apple’s HFS+ system.
If you can’t SSH into your Pi, you should configure that now.
When you are able to SSH into your Pi, download the packages needed to interact with Apple’s time machine filesystems:
raz@pi: sudo apt-get install hfsprogs hfsutils hfsplus
Step A2: Install Samba 4.9.2
You’ll also need a relatively new version of Samba, the network file transfer software package. The versions provided by apt on Ubuntu are ancient, so you’ll need to download a binary or build it from the source.
Make sure your system samba will not interfere with the newer version:
raz@pi: sudo apt-get remove samba
I am using Samba 4.9.2; I’d recommend doing the same. You can download the source and build it like:
raz@pi: wget https://download.samba.org/pub/samba/stable/samba-4.9.2.tar.gz
raz@pi: tar -xzf samba-4.9.2.tar.gz
Make a file called build.sh:
DEB_HOST_MULTIARCH=$(dpkg-architecture -qDEB_HOST_MULTIARCH)

./configure \
    --prefix=/usr --exec-prefix=/usr --sysconfdir=/etc \
    --localstatedir=/var --libdir=/usr/lib/$DEB_HOST_MULTIARCH \
    --with-privatedir=/var/lib/samba/private \
    --with-smbpasswd-file=/etc/samba/smbpasswd \
    --enable-fhs --enable-spotlight --with-systemd

make -j$(nproc)
sudo make install

sudo cp bin/default/packaging/systemd/*.service /lib/systemd/system
sudo systemctl daemon-reload
sudo systemctl enable {nmb,smb,smbd,winbind}.service
sudo systemctl start {nmb,smb,smbd,winbind}.service
And put it in the directory you just extracted. Then run it. This configures, builds, installs, and enables samba 4.9.2 on your system.
raz@pi: source build.sh
If all goes well, you should now have the right samba version on your system. Check it with
raz@pi: which samba
it should say /usr/sbin/samba or similar, depending on your configuration.
Don’t worry if the nmb and winbind services don’t start; you don’t need them. Check your samba service is running:
raz@pi: sudo systemctl status smb
raz@pi: sudo systemctl status smbd
Your smbd service must be running and should output something like:
● smbd.service - LSB: start Samba SMB/CIFS daemon (smbd)
  Loaded: loaded (/etc/init.d/smbd; bad; vendor preset: enabled)
  Active: active (running) since Fri 2019-10-25 10:57:04 PDT; 8h ago
  Docs: man:systemd-sysv-generator(8)
  CGroup: /system.slice/smbd.service
       ├─1307 /usr/sbin/smbd -D
       ├─1309 /usr/sbin/smbd -D
       ├─1310 /usr/sbin/smbd -D
       └─1351 /usr/sbin/smbd -D

Oct 25 10:57:02 pi systemd[1]: Starting LSB: start Samba SMB/CIFS daemon (smbd)...
Oct 25 10:57:03 pi smbd[1134]:  * Starting SMB/CIFS daemon smbd
Oct 25 10:57:04 pi smbd[1134]:    ...done.
Oct 25 10:57:04 pi systemd[1]: Started LSB: start Samba SMB/CIFS daemon (smbd).
Oct 25 13:54:19 pi smbd[19931]: pam_unix(samba:session): session opened for user raz by (uid=0)
Oct 25 13:56:39 pi smbd[19950]: pam_unix(samba:session): session opened for user raz by (uid=0)
Oct 25 15:18:08 pi smbd[19950]: pam_unix(samba:session): session closed for user raz
Oct 25 17:29:26 pi smbd[19931]: pam_unix(samba:session): session closed for user raz
If your service is not running, try enabling and starting the smbd or smb services manually
raz@pi: sudo systemctl enable smbd
raz@pi: sudo systemctl start smbd
Step B: Physical Setup and Formatting
Step B0 (optional): If you have dongle and Mac handy, format your HDD to be a Time Machine Backup if you have not already.
This will make your life a lot easier if you can format your HDD to the Apple filesystem requirement (HFS+) using the Mac Disk Utility before you plug it in. Open up Disk Utility, select your external disk, and format it as MacOS Extended (Journaled).
Step B1: Physical configuration
Whether or not you did step B0, plug in your HDD to the Pi. Your physical setup should be similar to this diagram.
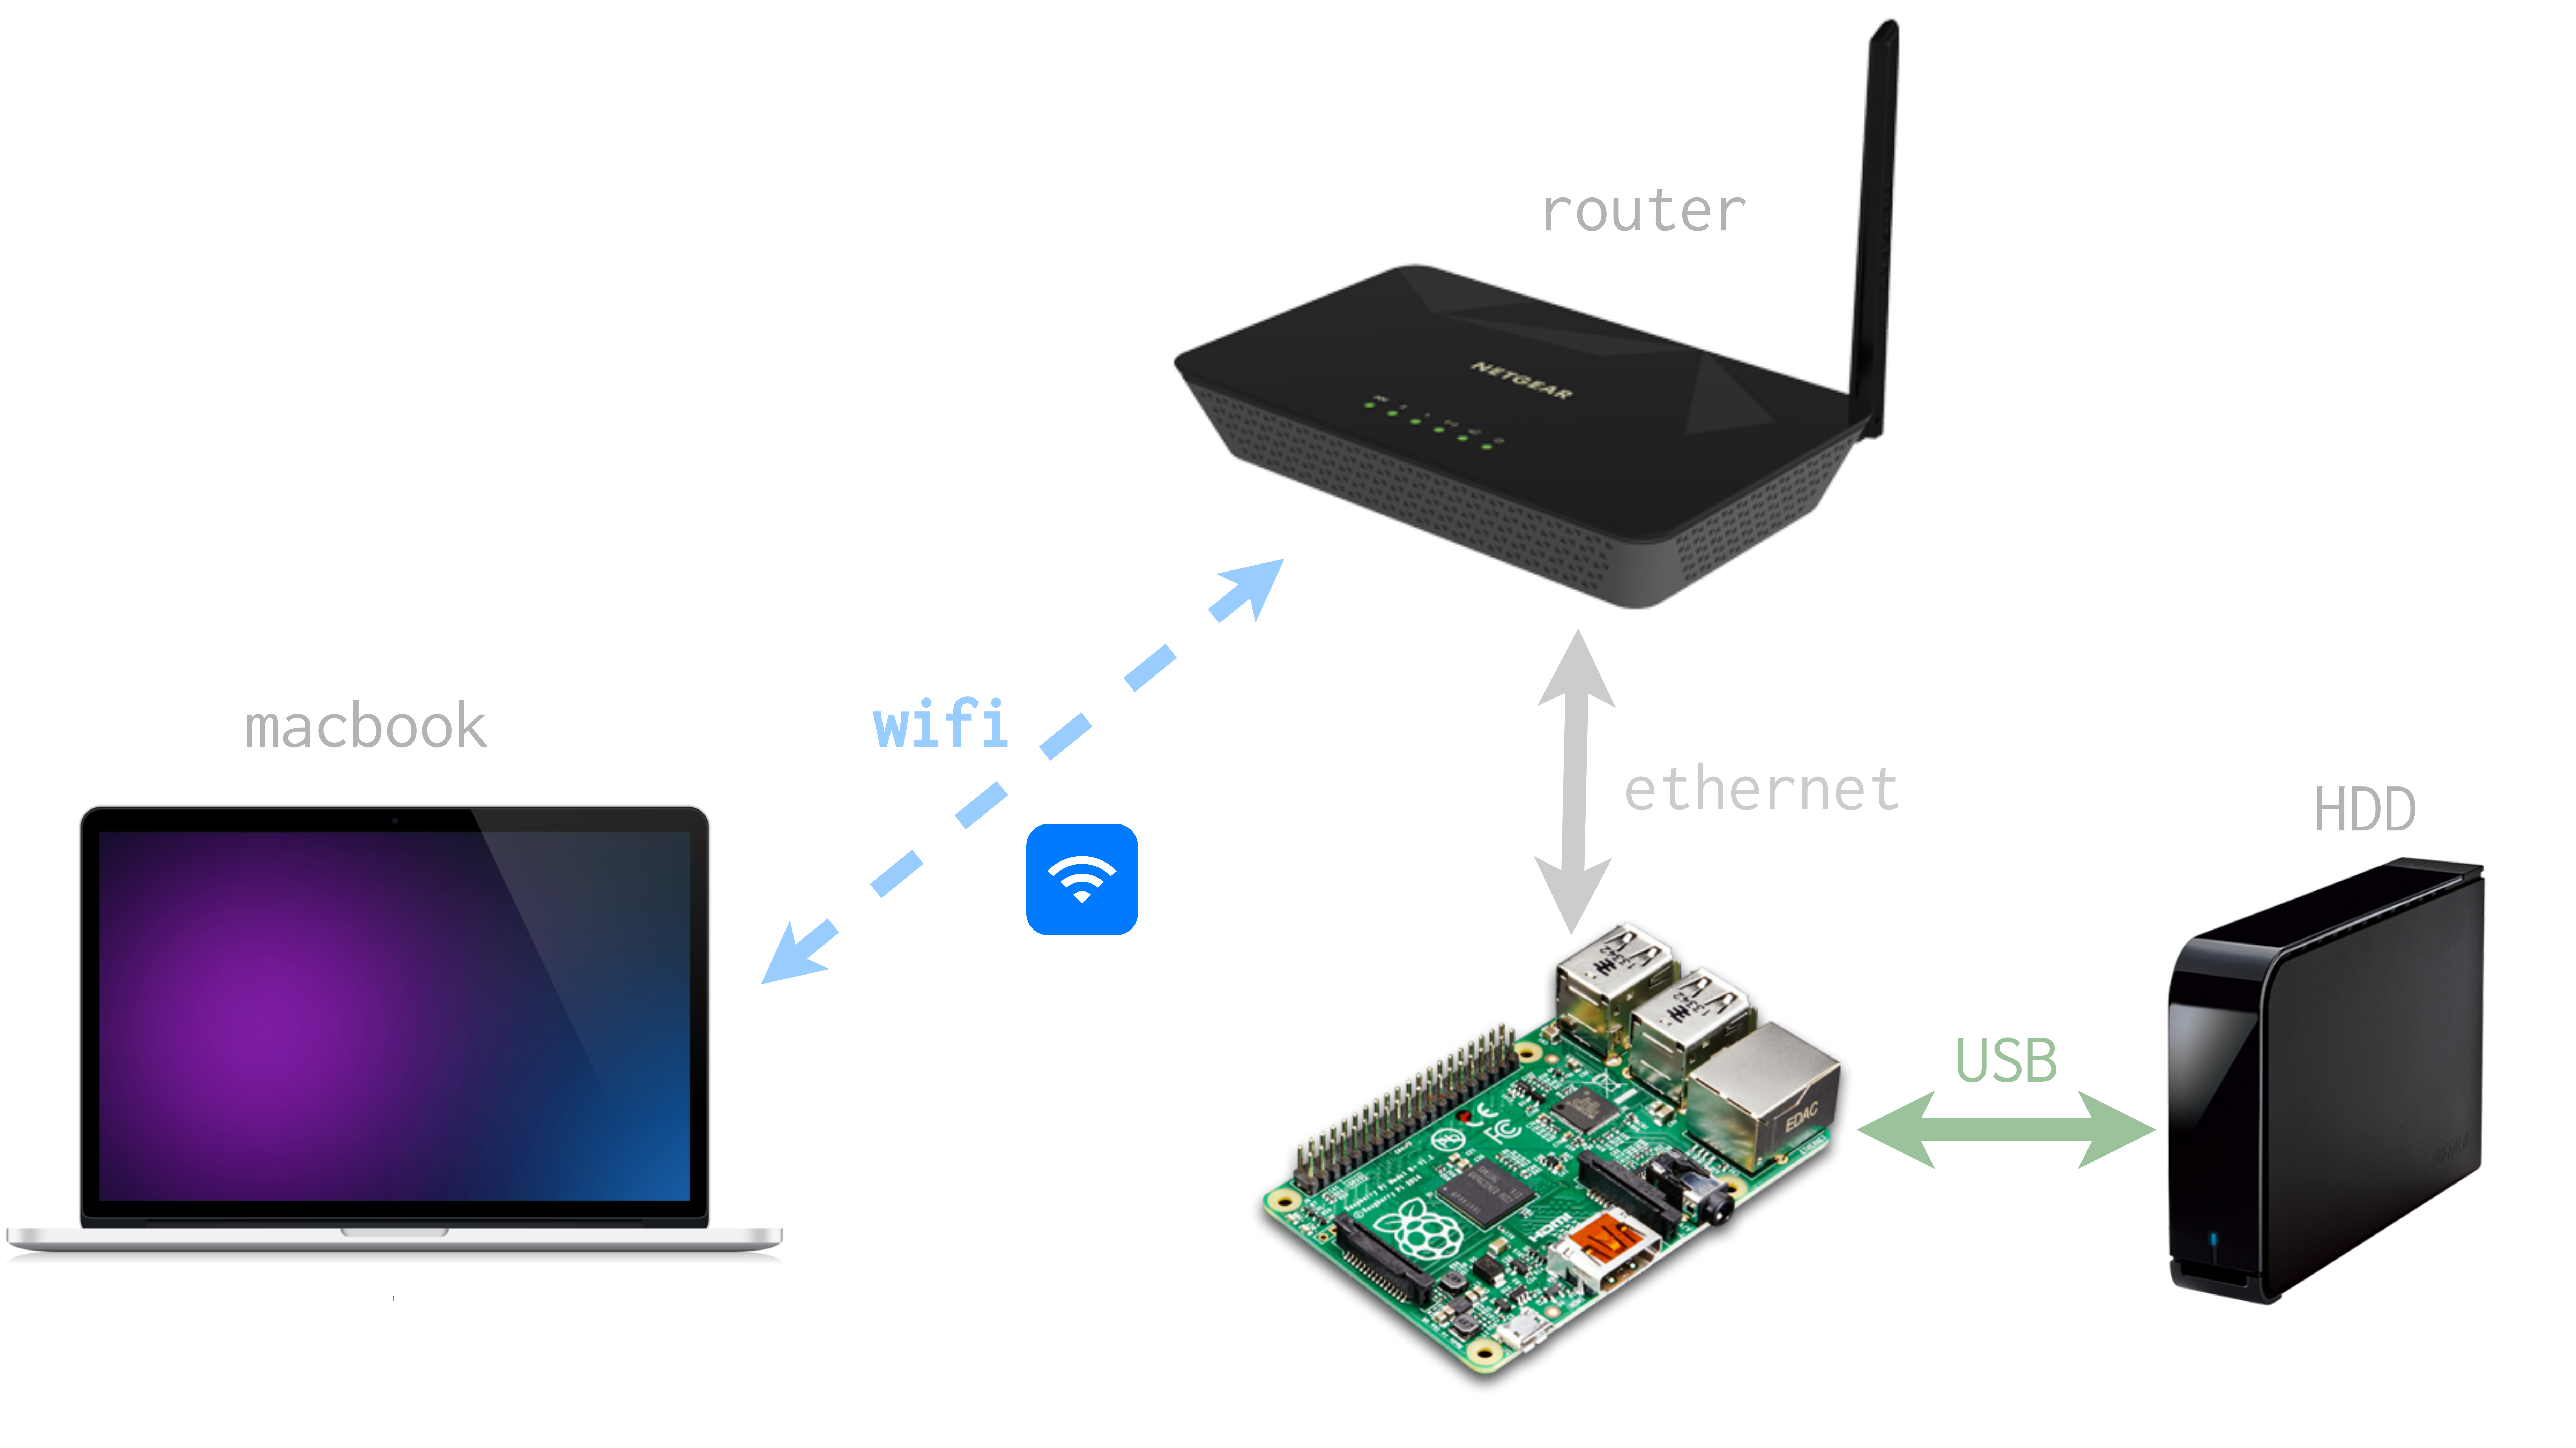
Check that the HDD is recognized as a block device with lsblk. If you have already formatted the drive then the disk may have automatically mounted.
raz@pi: lsblk
sda           8:0    0  1.8T  0 disk
├─sda1        8:1    0  200M  0 part
└─sda2        8:2    0  1.8T  0 part
...
My device is sda. The paritition I’ll use is /dev/sda2. Yours may be differently named depending on the block device assigned to your HDD by the OS.
Step B2: Format the drive
I’ll be brief here but if you did not do Step B0, now comes the hardest step in the whole process: formatting the drive to a form Time Machine can recognize. The instructions here will be brief and might work for you on the first try. If that is the case, consider yourself lucky - otherwise, Google/DuckDuckGo/Bing(yikes) is your friend.
if your drive is mounted, unmount it.
sudo umount /dev/sda2
Warning: make sure you are using your device’s block device id (e.g. /dev/sdb, etc.). Don’t just blindly copy and paste these commands!
Open GParted (you can use parted too). If you’re SSH’d into your Pi you can enable X forwarding to bring up the GParted GUI on the computer you’re using. Do this by logging out of your Pi and logging in again, doing ssh -X raz@10.0.0.8. Use your username and local IP instead of mine, obviously.
Start GParted:
raz@pi: sudo gparted
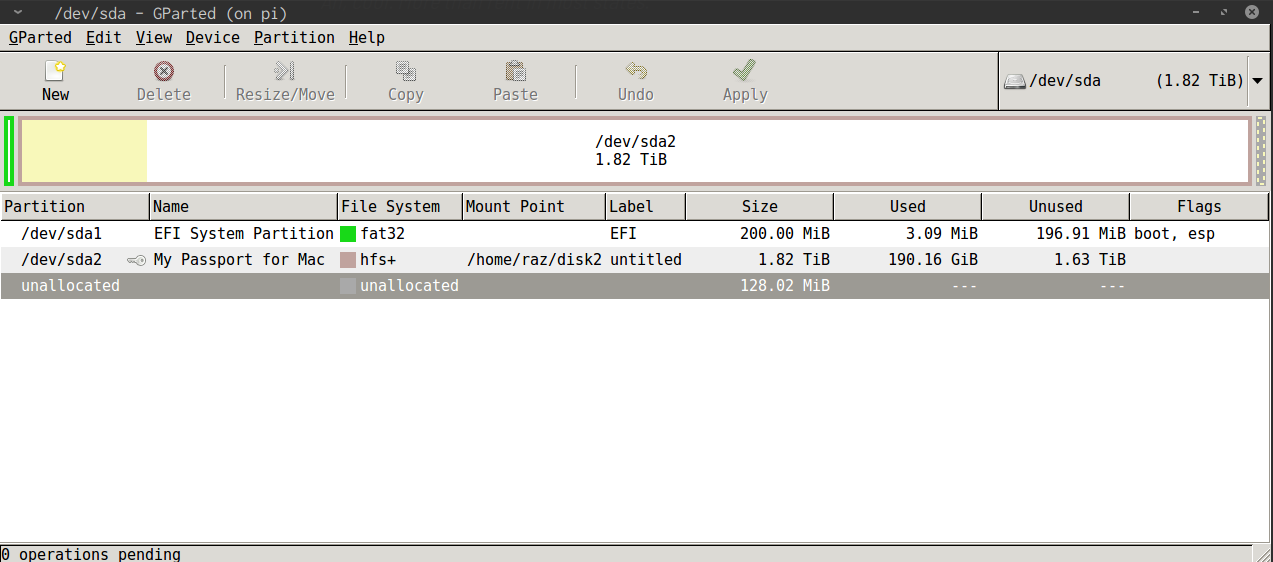 My drive is already formatted in this picture
Select your HDD using the selection box in the upper righthand corner. Make sure you are using the correct drive. I am no longer accepting angry emails from people who formatted their root filesystems.
Depending on your partition scheme, you may need to delete all your partitions. I did not, since (as you can see in the picture) I had only a tiny amount of space taken up by an old EFI partition. Once you have a large unallocated partition, right click the partition hover over Format to..., selecting hfs+. If this option is not available, make sure you installed the hfs requirements in Step A1.
Now click Apply! to format the drive.
If your drive formatted successfully, you will see hfs+ as the filesystem for the partition you made. My formatted partition is /dev/sda2
Step C: Mounting and configuration
If you’ve made it this far, congrats, you’re 90% of the way there!
Step C1: Configure fstab and mount
Decide where you want to mount the disk. I use /home/raz/disk2 on my machine.
To make your drive mount on boot, configure the fstab file. The most reliable way is using the UUID. Find this with the blkid tool, which comes installed on most Debian-based distributions.
raz@pi: blkid /dev/sda2 # this is the partition I have formatted as hfs+

/dev/sda2: UUID="621c9dbc-1614-3538-80a5-38d798657cdb" LABEL="untitled" TYPE="hfsplus" PARTLABEL="My Passport for Mac" PARTUUID="405751cc-68b9-4a09-a2f9-2fa06aac0c7b"
The UUID you want is the first UUID= field returned. Copy this, then
raz@pi: sudo vim /etc/fstab
Add the following line, using your mountpoint and UUID:
UUID=621c9dbc-1614-3538-80a5-38d798657cdb /home/raz/disk2 hfsplus force,rw 0 2
The first column is the ID. The second is the mountpoint. The third is the filesystem type. The fourth column is our mounting options - since we need both read and write privileges, we use rw and we also force the mount. You can read more about the final two columns here.
Now, a quick moment of truth:
raz@pi: sudo mount -a
And check your mounted devices (mine is /dev/sda2):
raz@pi: lsblk

NAME        MAJ:MIN RM  SIZE RO TYPE MOUNTPOINT
sda           8:0    0  1.8T  0 disk
├─sda1        8:1    0  200M  0 part
└─sda2        8:2    0  1.8T  0 part /home/raz/disk2
sdb           8:16   0  3.7T  0 disk
└─sdb1        8:17   0  3.7T  0 part /home/raz/disk4
sdc           8:32   0  7.3T  0 disk
└─sdc1        8:33   0  7.3T  0 part /home/raz/disk8
mmcblk0     179:0    0 14.9G  0 disk
├─mmcblk0p1 179:1    0   63M  0 part /boot
└─mmcblk0p2 179:2    0 14.8G  0 part /
If you do
raz@pi: sudo fdisk -l
And look for the disk, you should see something like:
Disk /dev/sda: 1.8 TiB, 2000365289472 bytes, 3906963456 sectors
Units: sectors of 1 * 512 = 512 bytes
Sector size (logical/physical): 512 bytes / 512 bytes
I/O size (minimum/optimal): 512 bytes / 512 bytes
Disklabel type: gpt
Disk identifier: 37D20BEA-D14A-4C22-BD8F-BC552AE064F1

Device      Start        End    Sectors  Size Type
/dev/sda1      40     409639     409600  200M EFI System
/dev/sda2  409640 3906701271 3906291632  1.8T Apple HFS/HFS+
There can be problems if you don’t allow the correct user rights on the mounted disk though. The easiest way to solve this is just by changing the owner and permissions of the mounted disk. Once mounted, enter (of course changing the mountpoint to your mountpoint and user)
raz@pi: sudo chown /home/raz/disk2 raz
raz@pi: sudo chmod 777 /home/raz/disk2
The hfs filesystem is now mounted and ready to be used by samba!
Step C2: Writing the samba config file.
You should open up the samba configuration file: /etc/samba/smb.conf and customize the general options to your needs, if you have not already. Then add your time machine share. Mine is called timemachine.
raz@pi: sudo vim /etc/samba/smb.conf

# in /etc/samba/smb.conf
[timemachine]
comment = Time Machine
path = /home/raz/disk2
browseable = yes
writeable = yes
create mask = 0600
directory mask = 0711
spotlight = yes
vfs objects = catia fruit streams_xattr
fruit:aapl = yes
fruit:time machine = yes
public = yes
Save the file. Reboot, or just restart your samba instance
raz@pi: sudo reboot
If you get a kernel panic on boot, you probably have a problem with your fstab file. If not, just make sure your smbd service is running and your disk is mounted as intended!
Now comes the real moment of truth.
Step D: Test out your new time machine.
On your mac, open up the Time Machine application.
If your installation and configuration went well, there should be an available disk on the network now.
Select a disk.
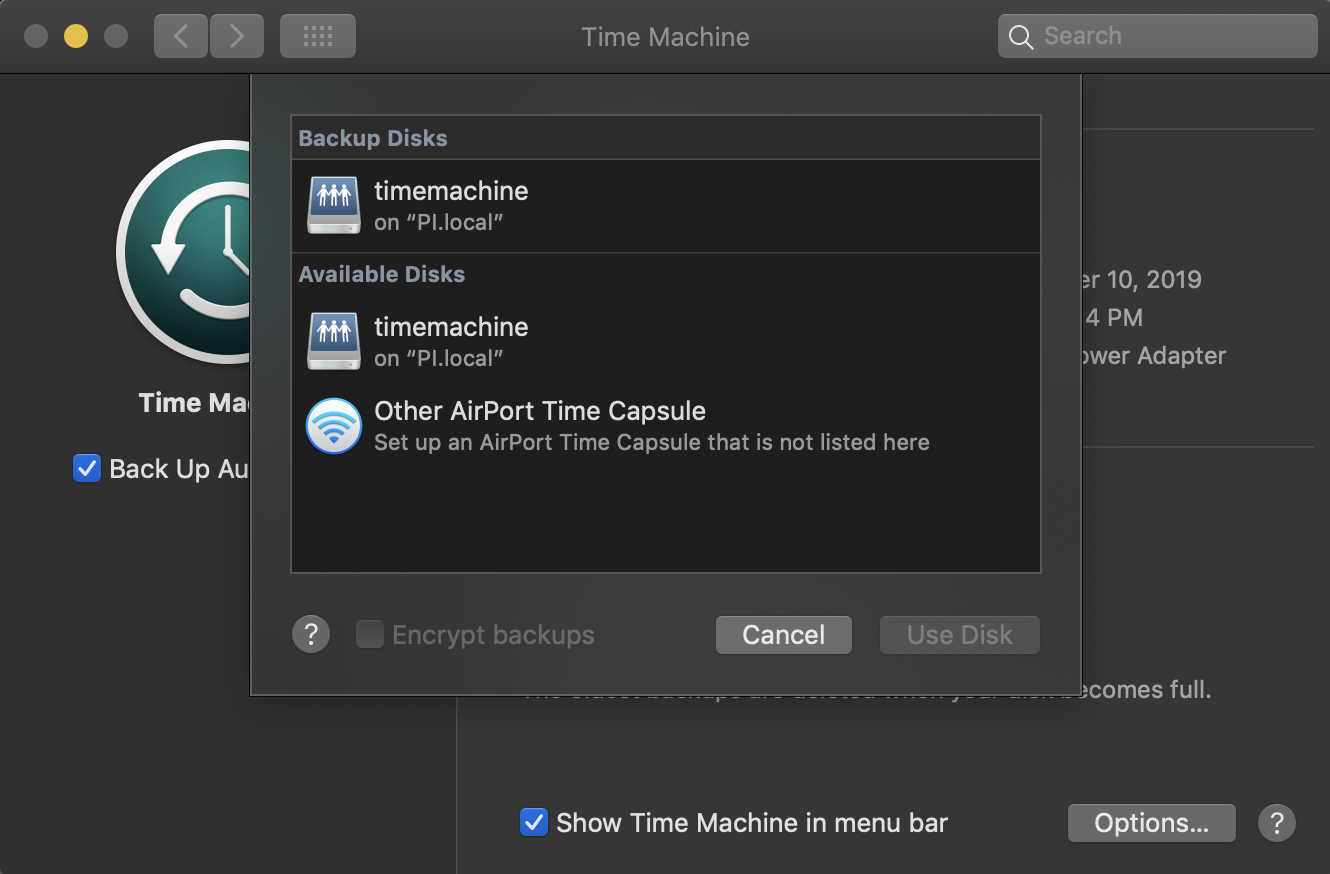
Select the disk on your network.
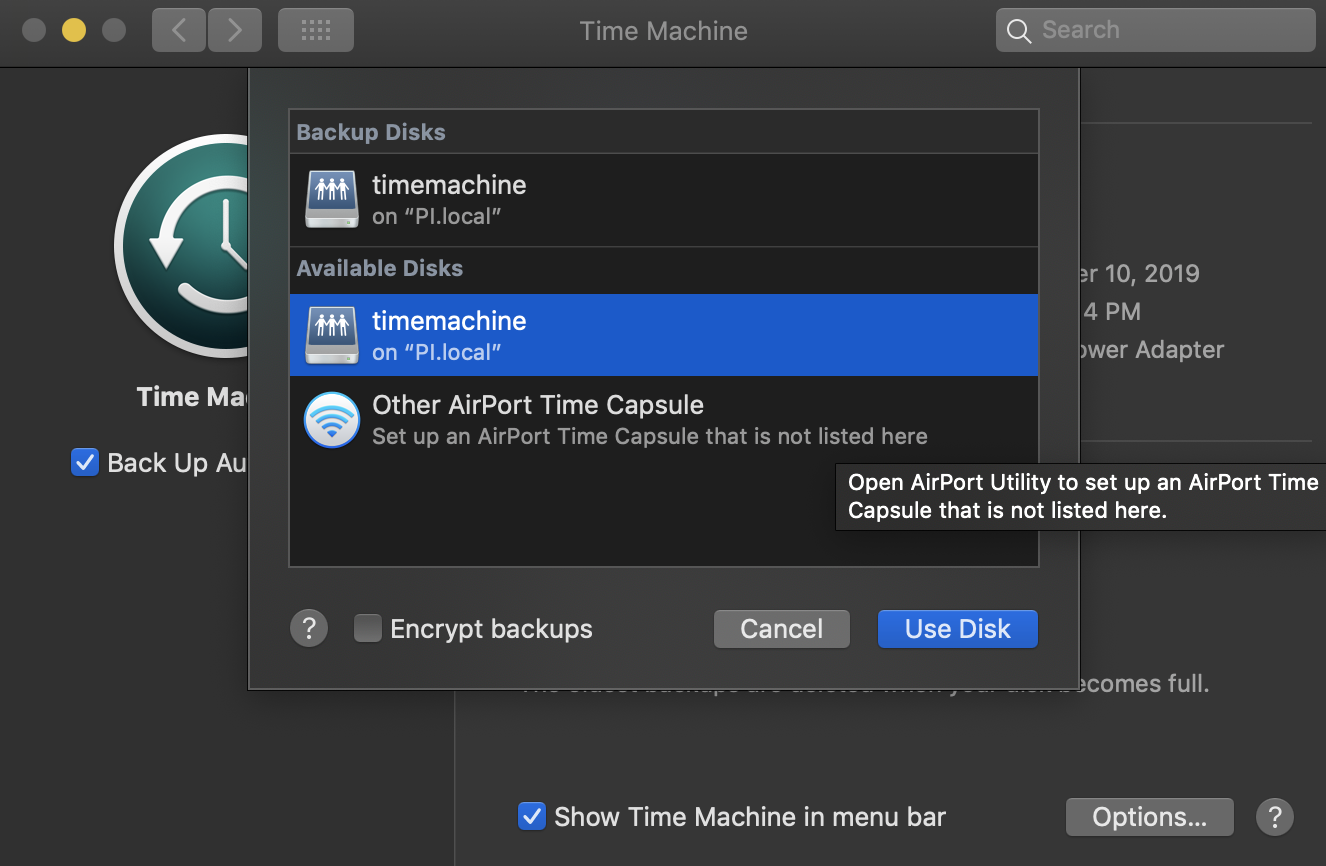
If Time Machine asks you to log in, log in as the user on your raspberry pi, not as a guest. Time Machine will not work if you use the network location under a guest login; this is because in our samba config we configured the default file and directory masks. So in my case, this means logging in as raz, my one and only non-root system user.
Create a backup now.
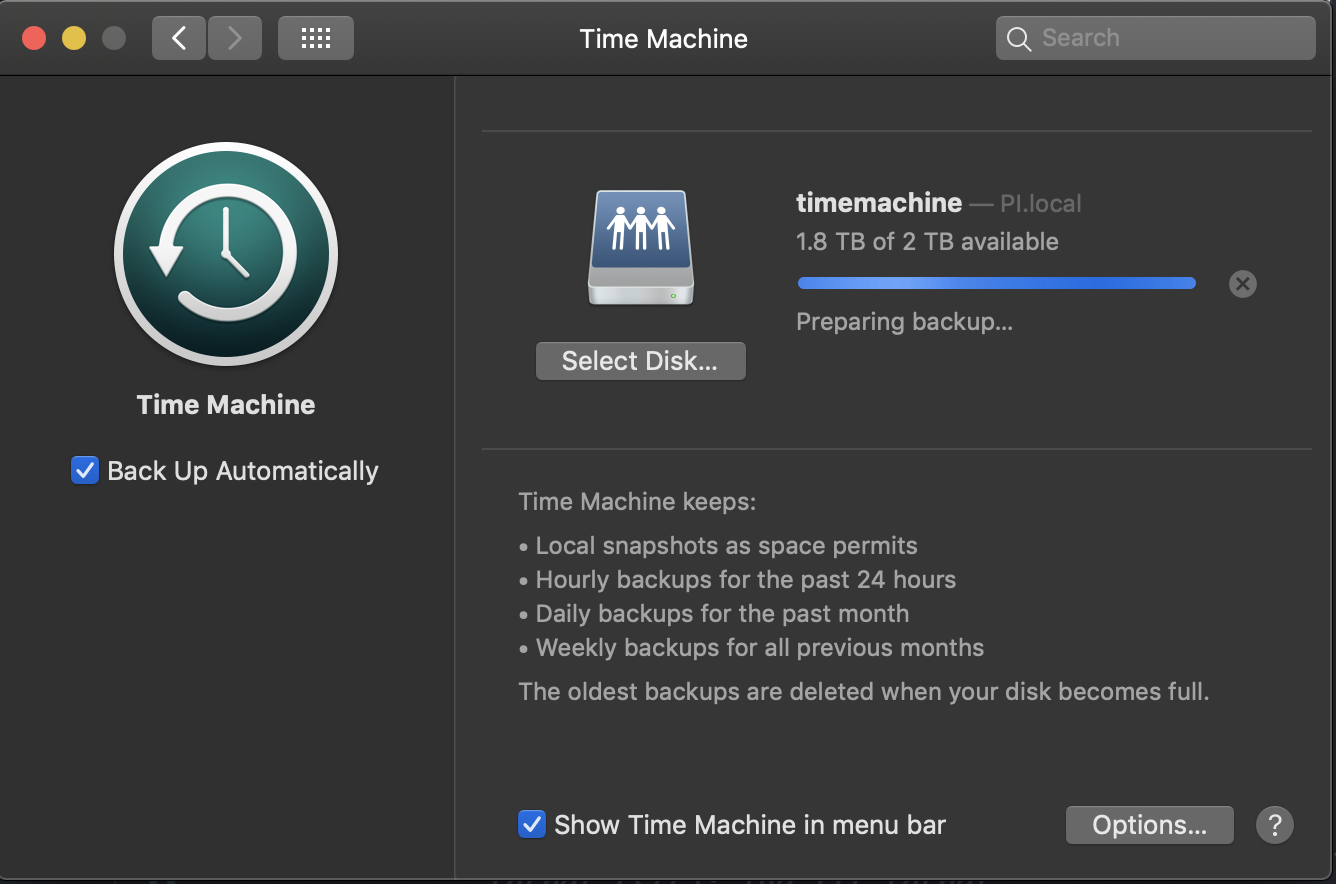
If you screen looks like this, you’ve won!

If Time Machine is saying there is a problem with the disk, make sure your /etc/samba/smb.conf is configured correctly. If this is your first time making a Time Machine backup on this disk, it will take a while (probably a day) to make your first backup. After that, it will only take a few minutes each time.
Congratulations!
You are now the proud owner of a Raspberry Pi Time Machine. If you didn’t make it this far, keep debugging. It took me a handful of hours to get my setup configured correctly - hopefully my debugging saved you at least a little time.
Maintenance and conclusions
The beauty of this setup is it requires very little maintenance. Sometimes Time Machine will say there is a problem with the disk (usually after a macOS update). Usually (almost always) just restarting your Mac will take care of this error.
In conclusion, we’ve set up a Raspberry Pi with external HDD which will automatically back up your machine in your sleep without having to plug it in. In the event your Mac is subject to an accidental bath, fire, or radioactive bear attack, rest assured the entirety of your Mac’s data will be safe and sound.