TOC:
- Introduction
- Step A: Configure SSH Access
- Step B: Configure automatic backups with crontab and rsync
- Step C: Easily mount your Pi with SSHFS
- Step D (optional): Configure access outside the local network
- Step E (optional): Configure a samba share
- Maintenance and Conclusions
For $35, the Raspberry Pi is an incredible single board computer. You can connect to the internet, run Linux, automate your home, or make a robot - the list goes on and on. And regardless of your choice of project, the Raspberry Pi community will almost always be there for you if (read: when) you need help.
But what good is a Pi if you don’t have a good project?
This is the question I was faced with after giddily buying one in 2017. I played around with it … but honestly? I never really had a need for it, nor could I think of any projects that (1) were cool or interesting, (2) I’d actually use on a frequent basis, and (3) didn’t require buying $100+ in gadgets I wouldn’t otherwise use. So, my poor RPi 3b was delegated to a lonely drawer, where it sat for over a year.
Finding a use
This year, my personal archive (holding 20+ years of my family’s beloved family pictures, my financial documents, and my photography) spilled over the 1TB mark. My old laptop’s HDD could no longer hold it all. Plus, my HDD was the only current and full copy of my data I had. If it got lost, corrupted, or destroyed somehow, my entire digital life was as good as gone! Backing up to external HDDs via wires was annoying, cloud services for backup cost money (+ I don’t trust them), and premanufactured network attached storage (NAS) systems can cost hundreds of dollars. I needed a better solution, using tech I already had. Hence, my Raspberry Pi “Home Cloud” was born.

Making the Home Cloud
Disclaimer: This NAS setup is hacky but works
When setting up this cloud, my only requirements were:
- it be fast enough that I could stream HD movies off of it to the local network without buffering
- it make at least one redundant backup
- it be resistant to my own stupidity (e.g., an accidental
rm -rf * && shred *) - it is resistant to being hacked by port scanners etc. if available outside the local network
The guide is written such that these requirements are satisfied while not requiring an exorbitant amount of debugging or headaches (i.e., no reformatting to set up RAID with delayed parity). Hey, this is a Tech MacGyver-style guide after all, not “how to do things the most perfect, right, and clean way humanly possible”. If you want to do that, I’d look into home cloud setups like ownCloud.
What does it do, in layman’s terms?
Access all documents/photos/movies on my data archive from my laptop or phone wirelessly, whether on the local network or outside the local network. Keep two separate disks, in case of a random failure. Automatically back up the main disk to the backup disk every 24 hours. I no longer have to keep my archive on my laptop, but can still access it whenever I want.
What does it do, specifically?
Samba and SFTP servers on the local network; SFTP server outside the local network accessible made possible via port forwarding. Uses rsync to sync disks on a regular basis with crontab.
What you need:
A main computer (or a phone) - This is what you will use to SSH into your Pi, and transfer/view media. Or just use your phone with an SSH and Samba/FTP client.
Yep, it’s a laptop Yep, it’s an iphone 
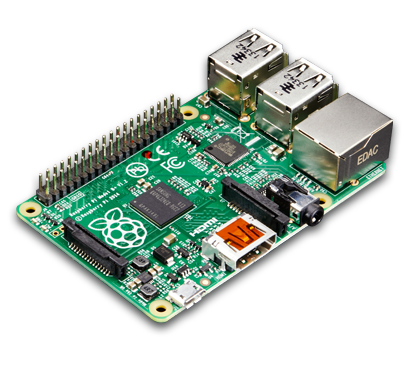
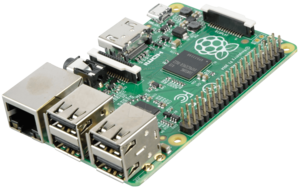
A Raspberry Pi with an OS installed - This will control your network attached storage. I used a Raspberry Pi 3b+.
One (or some) external HDDs and connection cables - These will be your storage disks. I used some garbage 2TB Seagate Backup Slim I had lying around, and a 8TB Seagate Backup Plus I got as a christmas present. Most external HDDs connect using USB-SATA connections.
Drive #1 (Old Seagate 2TB) Drive #2 (newer 8TB Seagate Expansion) 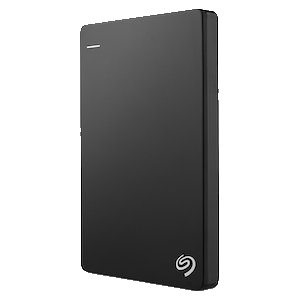

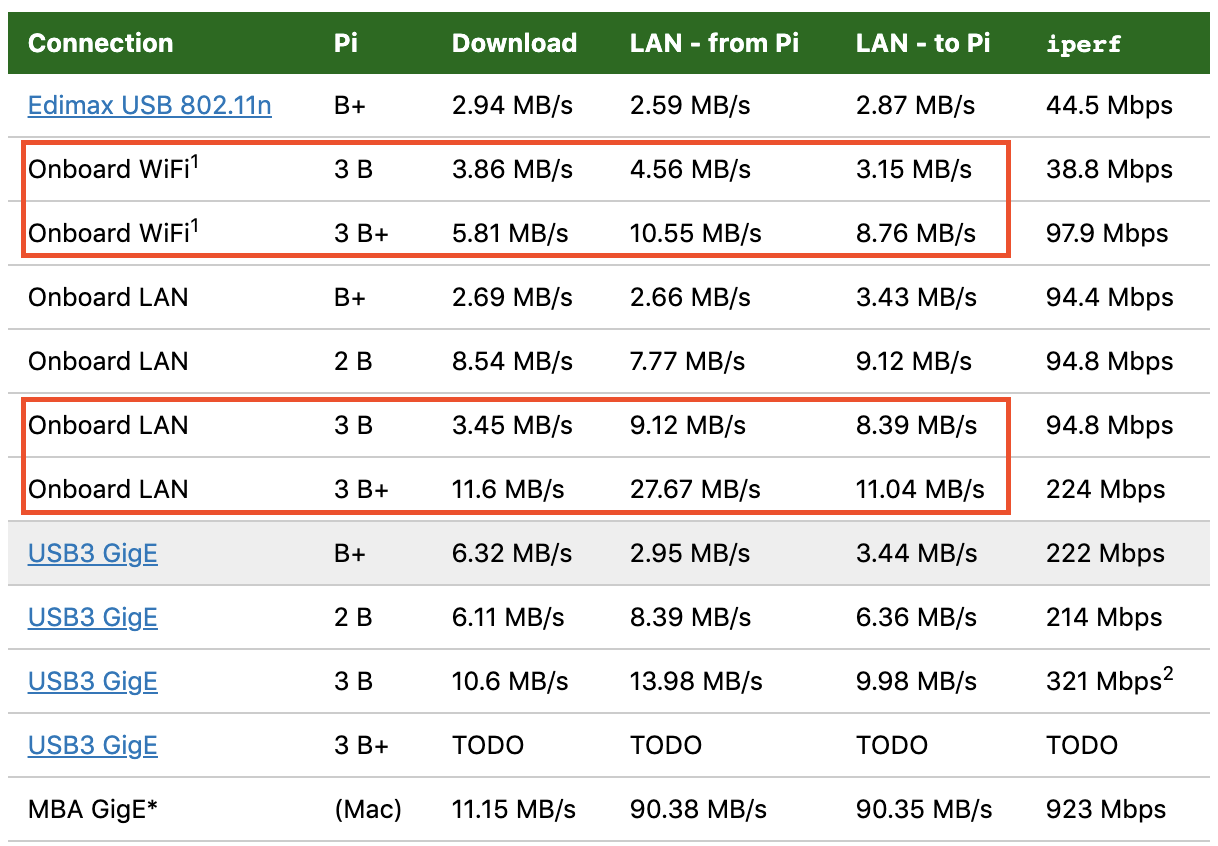
Access to your wifi network and router, + an ethernet cable - In the interest of rapid file transfer, you’ll definitely want to have your Pi wired rather than wireless. The raspberry pi’s wireless speed is noticeably less than the LAN speed: Jeff Greerling’s Raspberry Pi Dramble site has a great table comparing the LAN vs WiFi speeds:
Some basic bash familiarity
An hour of your dedicated time.
Steps
A. Configure local SSH access to your Raspberry Pi.
Objective: Set up the Pi so you can access it from your main computer on the local network. After this step, you shouldn’t need to do any physical work. You should connect a mouse, keyboard, and monitor to your Pi for these steps.
Plug the ethernet cable into your Pi and the other end into your router. Join the network. Your router should automatically assign an IP to the Pi with DHCP.
Now, we need to enable SSH server on the RPi, so open a terminal on it. Type the following to install the SSH server and start it (it should automatically start on reboots).
$ sudo apt-get update
$ sudo apt-get install openssh-server
$ sudo service ssh start
Get the IP of the Pi on the network:
$ ip addr

...
2: enxb827ebc8d04f: <BROADCAST,MULTICAST,UP,LOWER_UP> mtu 1500 qdisc pfifo_fast state UP group default qlen 1000
    link/ether b8:27:eb:c8:d0:4f brd ff:ff:ff:ff:ff:ff
    inet 192.168.0.2/24 brd 192.168.0.255 scope global dynamic enxb827ebc8d04f
        valid_lft 17842575sec preferred_lft 17842575sec
...
The IP address you are interested in is the wired network interface, not the wireless or loopback. So note the
inetaddress of the interace namedenxb827ebc8d04f(or similar, notwlan0orlo). In this case the IP address I am using is 192.168.0.2.Try rebooting the Pi and SSHing into it via another computer or phone (e.g.,
ssh raz@192.168.0.2- my username israz, which I’ll use for the rest of the tutorial). If you can reboot and SSH into the Pi, it’s now time to make sure we can SSH in reliably by assigning a static IP to the Pi.Enable a static (or long dynamic lease) IP for your raspberry Pi.
On your computer or phone, go into your router and assign your Pi an infinite (or very long) DHCP lease on its IP address. This will enable you to SSH or Samba into your Pi in the future without IP hiccups. Go into your browser and configure your router by going to usually
192.168.0.1or10.0.0.1. Exactly how you change this lease time depends on your router. When you’re done, you should see something like this:
The Pi’s lease on this IP will last for the next 4,166 days (just long enough to make a DMV appointment). From here forward, you’ll be able to SSH into your Pi at this local IP.
Now we can physically configure your external storage. You are safe to unplug the peripherals from the Pi and put it in its final storage location (mine’s in a drawer). Plug in your external storage devices to your Pi and then make sure your storage devices are available via SSH:
raz@pi:~$ lsblk
NAME        MAJ:MIN RM  SIZE RO TYPE MOUNTPOINT
sda           8:0    0  1.9T  0 disk
└─sda1        8:1    0  1.9T  0 part /home/raz/disk2
sdb           8:16   0  7.3T  0 disk
└─sdb1        8:17   0  7.3T  0 part /home/raz/disk8
mmcblk0     179:0    0 14.9G  0 disk
├─mmcblk0p1 179:1    0   63M  0 part /boot
└─mmcblk0p2 179:2    0 14.8G  0 part /
I have mine mounted at /home/raz/disk* - yours will by default be mounted elsewhere such as /media/raz. My 8TB disk is mounted as disk8 and the 2TB is mounted as disk2. If you want to mount this drive automatically on boot, edit your /etc/fstab file - there are lots of good guides online for this, but to save you some time, determine the UUID for your device with blkid /dev/sdxY and add a line like:
UUID=5C0D3CF332CF3A92 /home/raz/disk8 ntfs defaults 0 2
To your /etc/fstab file.
Great! If you’ve gotten this far, all of your physical configuration should be done.
B. Configure automatic backups
The two tools we will be using for automatic backups are rsync and crontab. The idea is that rsync will synchronize the disks on a schedule dictated by the system (crontab).
Install and configure rsync
First we install rsync if you do not already have it installed:
raz@pi:~$ sudo apt-get install rsyncNow we will have rsync make a copy of our master disk to our backup disk. The master disk is what we will use later as our file server; the backup will just be there in case something goes wrong. In my case, I am using the 8TB disk as the master because it is a good amount faster than the older 2TB disk.
Make a new file in the Pi’s home directory namedsync_script.shwith the following contents:#!/bin/bash # In ~/sync_script.sh on your raspberry pi dt=$(date '+%d.%m.%Y-%H:%M:%S'); rsync -auvhs /home/raz/disk8/* /home/raz/disk2 --delete > /home/raz/logs/"$dt".txti 2>&1This script uses rsync to back up the master to the backup, including deletions and renames on the master. If you need to change the behavior, change the arguments of the rsync command. When backups occur, log files are written to a logs directory organized by date - you’ll need this for the next step. You’ll also need to change the directories for your own raspberry pi and mount points. Change
/home/raz/disk8to the mount point of your master drive and/home/backup/disk2to the mount point of your backup, and change/home/raz/logs/if you want a different logs directory.Configure crontab for backups
Enter the crontab editor with:
raz@pi:~$ crontab -eAdd the following line to the crontab file:
0 2 * * * bash ~/sync_script.shThis runs your sync script at 2:00am every day. Change the crontab specification if you want a different backup frequency - crontab guru has a great interactive tool. I like a daily backup because it backs up frequently enough for the contents of the disks to be redundant, but not so frequently that I can’t undo a rogue
rm -rfon the master drive. Once you’ve decided on a crontab setup, exit the crontab editor.
Now your data is being backed up automatically. You should try running raz@pi:~$ source ~/sync_script and check the logs in your newly-setup log dir to make sure it is syncing as intended. The next step is to make your master drive easily accessible from the local network.
C. Easily mount your server
By default, all SSH-enabled servers have SFTP enabled. So you are already able to connect via your computer’s file explorer or FTP apps on your phone or computer.
However, a more convenient way of accessing your share is with sshfs. sshfs is a simple SFTP utility which mounts your server to a computer and makes it appear like any other hard drive. If you’re on Linux with the apt package manager, you should be able to do a simple
$ sudo apt-get install sshfs
If it is not already installed. For Mac, check out this helpful FUSE package. For Windows, the sshfs-win package might be helpful.
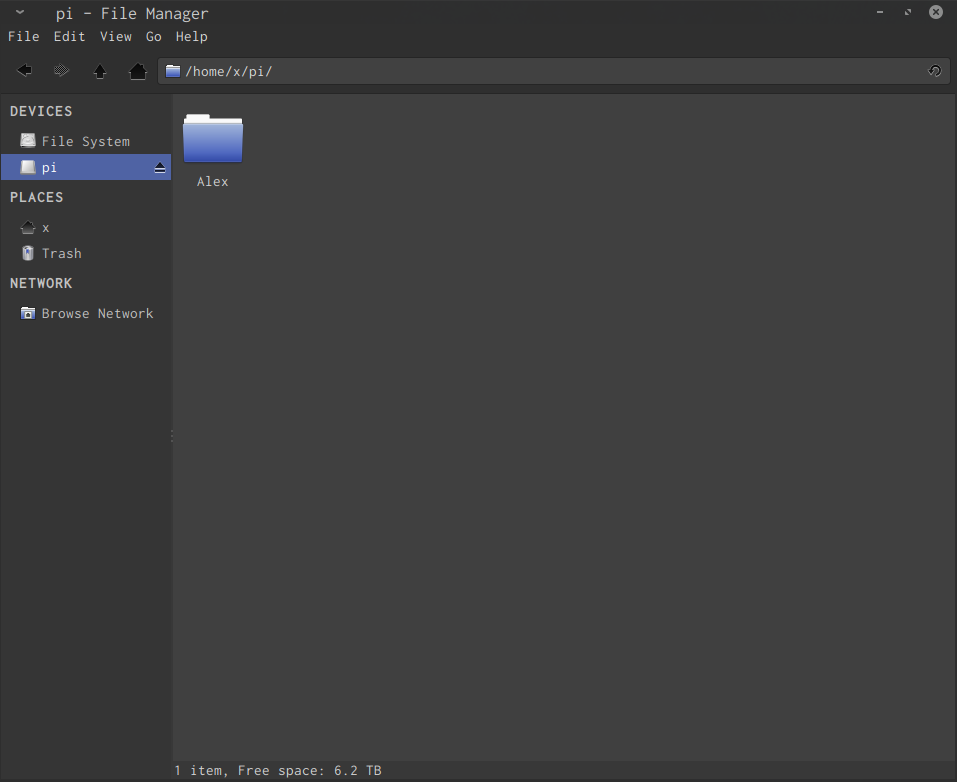
Then mkdir a directory where you’d like to mount your server. I personally use ~/pi/. For further convenience, you can set up an alias command in your /.bashrc to mount it with a short command:
alias pifs="sshfs raz@$LOCAL_SERVER_IP:/home/raz/disk8 /home/x/pi/"
Now go ahead and mount your server with pifs. You should be able to browse your server files in a terminal, file browser, or almost any other application!
If you go through the steps in part D, you’ll need to change your IP to your public facing one (or add an additional alias). You’ll also need to specify the port you are using if it is not the standard port 22.
And youre done!
Congrats on the new home cloud!
This is what my physical setup looks like:
Stunning, I know
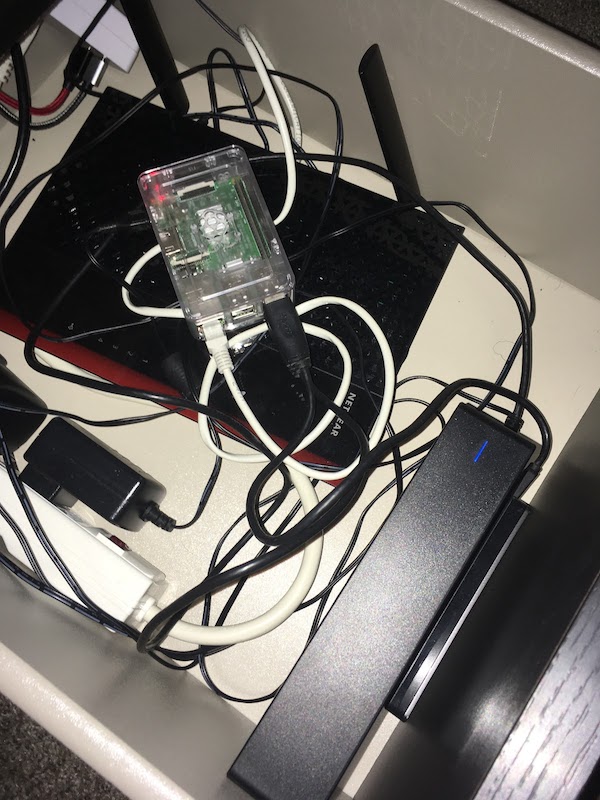 I keep it stashed away in a drawer, out of sight and out of mind. Beauty is in the eye of the beholder…
If you want to access your Pi (and data) from outside your local network, read section D.
D. Optional - Create and secure access outside the local network
Harden your SSH server.
If you open up your cloud to outside connections, you face a very real threat of cyber-attack, mostly in the form of port-scanners and roaming bots which can (and will) dictionary-attack your open SSH connection. It is for this reason I recommend disabling password authentication into your SSH server - this does not mean there is no authentication at all, it means that your server can be accessed by SSH-keyfile authentication only. Only authorized devices will be able to log into your Pi and local network.
First, copy your client id(s) to your server via a secure method. In my case, my SSH clients are my laptop and my phone and my Pi is my server. For a computer, you can simply do (from the client on the local network):
$ ssh-keygen
$ ssh-copy-id -i ~/.ssh/id_rsa raz@192.168.0.2
You should test that you can access the Pi without a password:
$ ssh raz@192.168.0.2
raz@pi:~$
...
Now that your Pi is set up to allow for passwordless SSH logins, you should go into your Pi’s
/etc/ssh/sshd_configfile and adjust the following lines:# Authentication: LoginGraceTime 120 PermitRootLogin prohibit-password StrictModes yes ... # Change to no to disable tunnelled clear text passwords PasswordAuthentication noFor more security, you can also change the SSH port, though this is not really necessary since we will be doing this in the next step for the outward facing connection.
# What ports, IPs and protocols we listen for
Port 12345  # pick some random port
Then restart the server with
raz@pi:~$ sudo service ssh restart. Open a new terminal on the client and try logging in. You should log in without a password (provided your copied clientid_rsawas not password-protected). Then use a different device or account not authorized on the Pi to try to login. You should be completely unable to (even with the correct password).For more help on setting up secure SSH correctly, see ssh.com. For more logging and hardening tools (such as auto-banning IP’s that show malicious signs), check out Fail2Ban, which I highly recommend.
Enable port-forwarding on your router. Your server should be secure enough now that we can open it up to - gasp! - the world wide web. In your router’s interface, there should be a section for forwarding ports. You’ll want to map your network gateway (likely 0.0.0.0) with some random (unused by common services) port to your Pi local IP (in this example 192.168.0.2) with the default port (22) or the custom port you set in the previous step.
This is a screenshot of what my configuration looks like (custom ports redacted):

Test our your SSH/SFTP remote connection. Try connecting to your public IP from a login source outside of your local network (trying this from inside your local network will sometimes not work depending on your router and ISP). You can find out your public IP using:
$ curl ifconfig.meIf you can successfully SSH into your Pi, you should be able to SFTP into your Pi remotely - in other words, you can get your files from any (internet-connected) location in the world! All while having your files be safely in your home, under your own control, and backed up (at least backed up in case of disk failure or erasure, and not say, a house fire).
If you completed part C (enabling SSHFS), you can add an alias in your ~/.bashrc for accessing your server from anywhere:
alias pifsremote="sshfs -p 12345 raz@$REMOTE_IP:/home/raz/disk8 /home/x/pi/"
Potential problems: If your ISP changes your public IP regularly, this port-forwarding approach will only work for short periods of time (weeks).
E. (optional) Enable a Samba Share
Depending on the files and hardware you are running on, a Samba share may be as fast (or even faster) than SFTP; this is because the Pi’s little CPU has to encrypt SFTP packets whereas Samba does not (by default). For normal usage (watching HD videos over the network, for example) being served from the Pi, I’ve found Samba to be much faster. Aaaaaaaaand if you are a Windows user (boo, hiss) you’ll have an easier time getting Windows Explorer to connect to your share.
Install Samba.
raz@pi:~$ sudo apt-get install samba samba-commonConfigure Samba. There are tons of online guides for this, but we’ll go through a quick walkthrough here in the same way I configured mine (i.e., the absolute easiest and fastest way possible).
First, edit the your Pi’s Samba configuration file
raz@pi:~$ sudo vim /etc/samba/smb.conf. If you’re feeling dangerous, don’t make a backup of this file. Then, add this text for your share (and replace thePathwith your master drive’s mount point):# In /etc/samba/smb.conf [share] Comment =samba_share Path = /home/raz/disk8 Browseable = yes Writeable = Yes only guest = no create mask = 0777 directory mask = 0777 Public = yes Guest ok = noYou shouldn’t have to add yourself to a user group with this approach. This configuration basically says that anyone with an account on the Pi can login to the samba share. You can restrict this if needed, but I am the only one with an account on my Pi so this simple approach works fine..
Now enable the Samba
smdbservice:raz@pi:~$ sudo service smbd restartCheck that you can access your shared drive.
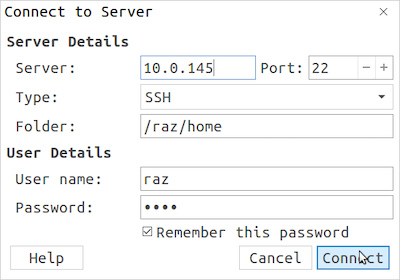
On Linux, most file browsers (such as Nautilus) will have a “connect to server” option which can be configured to automatically connect via SMB or SFTP to your share.
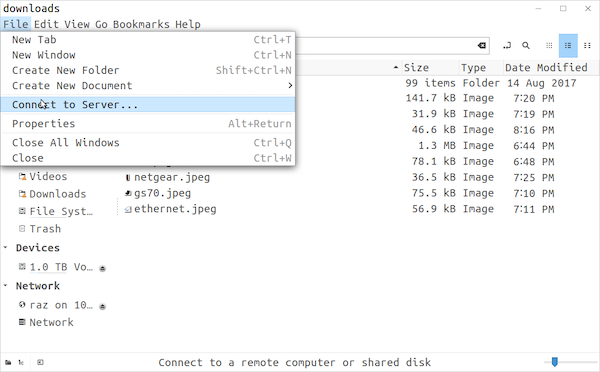
These linux screenshots are from an earlier verison of this tutorial which used a different IP and mountpoint.
Protip: Only make your password four letters long for extra danger!
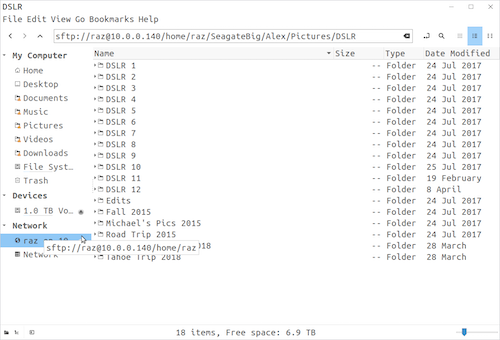
Configured correctly, your linux device will now automatically connect to your share.
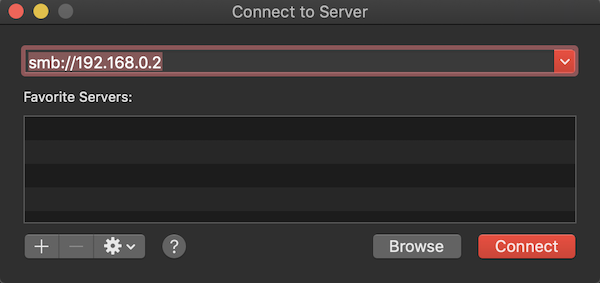
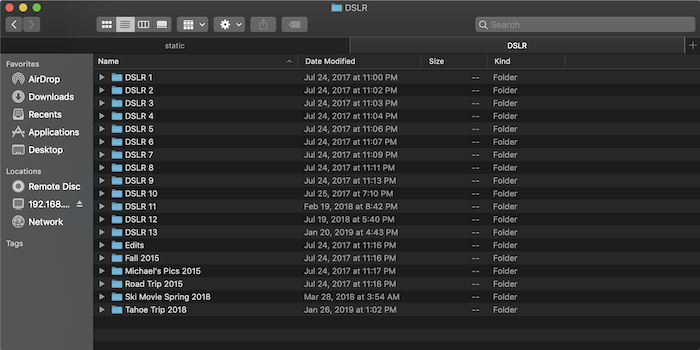
On Mac, you can just press cmd + K in Finder to connect via SMB or SFTP. Unfortunately, newer versions of MacOS (10.14+ but possibly earlier versions) allow read/write to SMB, but only allow read for SFTP. If you want to upload as well as download files then, you’ll need to use SMB or a 3rd party app.
On Windows, you can typically just click “Network” or “Network locations” in File Explorer. On your phone, most SFTP or Samba apps will work fine.
Remember, this samba share is only accessible on the local network, as it was intended. To enable remote samba, I recommend you look at some online tutorials and tread carefully.
Maintenance and Conclusions
The crontab commands pipe all the errors and output to a log file on the Pi on a daily basis. Of course, we could make the commands more sophisticated - “if there is an error during rsync, send me an email, remount all HDDs, and try again” (if you do this high-five to you) - but generally, simple is good enough for this little cloud.
In the end, we accomplished what we wanted:
I hope you enjoyed and get as much use out of the Pi as I do!